Snowflake in a Nutshell
Snowflake is an advanced analytics database and data warehouse as a service, which can be hosted on most cloud providers.
What sets Snowflake apart from other solutions is its unique multi-cluster shared data architecture, which combines elements of both shared-disk and shared-nothing architectures. This allows for high performance and scalability. The design of the database resembles the structure of a snowflake, which is how it got its name.
Key Components of Snowpark ML
Snowpark ML provides APIs to support each stage of an end-to-end machine learning development and management process and includes the following key pieces of functionality:
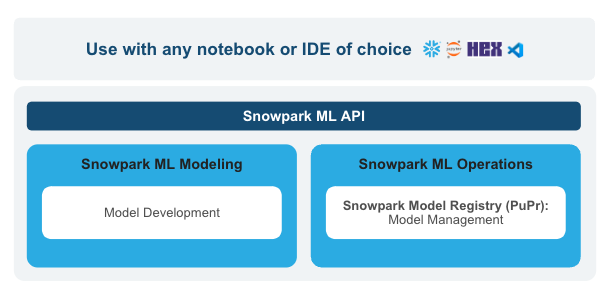
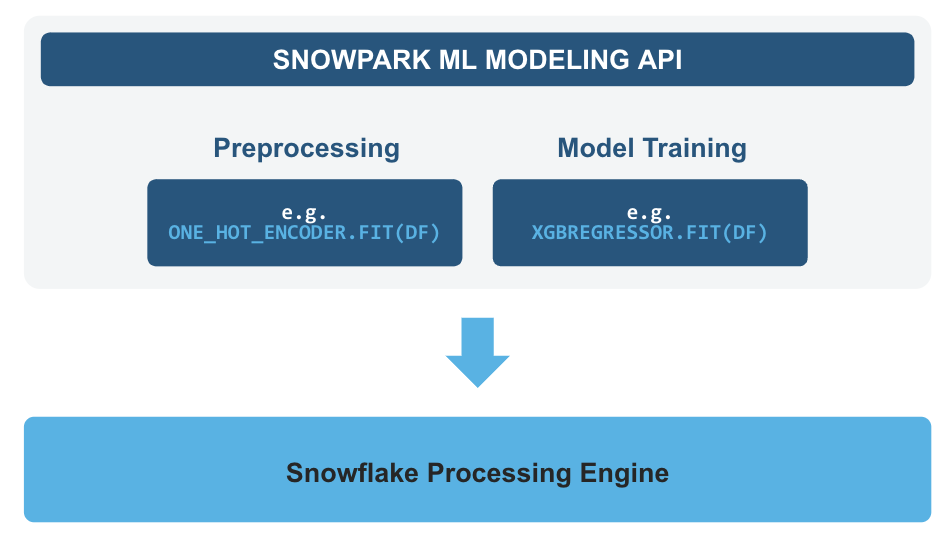
Snowpark ML Modeling
Snowpark ML Modeling supports data preprocessing, feature engineering, and model training in Snowflake using popular machine learning frameworks, such as scikit-learn, xgboost, and lightgbm. This API also includes a preprocessing module that can use compute resources provided by a Snowpark-optimized warehouse to provide scalable data transformations.
Snowpark ML Operations
Snowpark ML Operations (MLOps), featuring the Snowpark ML Model Registry, complements the Snowpark ML Development API. The model registry allows secure deployment and management of models in Snowflake, and supports models trained both inside and outside of Snowflake.
Snowflake Arctic: The Best LLM for Enterprise AI — Efficiently Intelligent, Truly Open
Product and Technology
AI & ML
Snowflake Arctic
How to Build Your Project Using Snowflake Arctic Model
Step 1: Setting Up the Environment
Install Python and Required Libraries:
- Ensure you have Python 3.8 or later installed on your machine.
- Use pip to install necessary Python libraries like Streamlit, Replicate, Transformers, gTTS, Streamlit-Player, and SQLite3.
Step 2: Setting Up the Project Structure
Create Project Directory:
- Create a new directory for your project files.
- Navigate to this directory to set it as your working directory.
Create Main Python Script:
- Create a Python script (e.g.,
app.py) that will contain the main code for your Streamlit application.
Step 3: Building the Streamlit App
Import Necessary Libraries:
- In your
app.py, import all the required libraries for the project, including Streamlit, Replicate, Transformers, gTTS, and SQLite3.
Set Up the Database:
- Initialize SQLite to store user interactions and persona data.
- Create tables to hold interactions and persona details if they do not already exist.
Helper Functions:
- Write functions to save and load user interactions and persona data to/from the SQLite database.
- Functions will handle database operations for saving interactions, loading past conversations, saving persona data, and retrieving persona data.
Streamlit Configuration:
- Set the page configuration using
st.set_page_configto define the title of your app. - Create a sidebar in Streamlit to accept the Replicate API token and model parameters such as temperature and top_p.
- Validate the API token input.
Step 4: Implementing Chat Functionality
Initialize Session State:
- Use Streamlit’s session state to store chat messages and persona data across interactions.
Display and Clear Chat Messages:
- Display chat messages dynamically from the session state.
- Provide a button in the sidebar to clear chat history, resetting the session state.
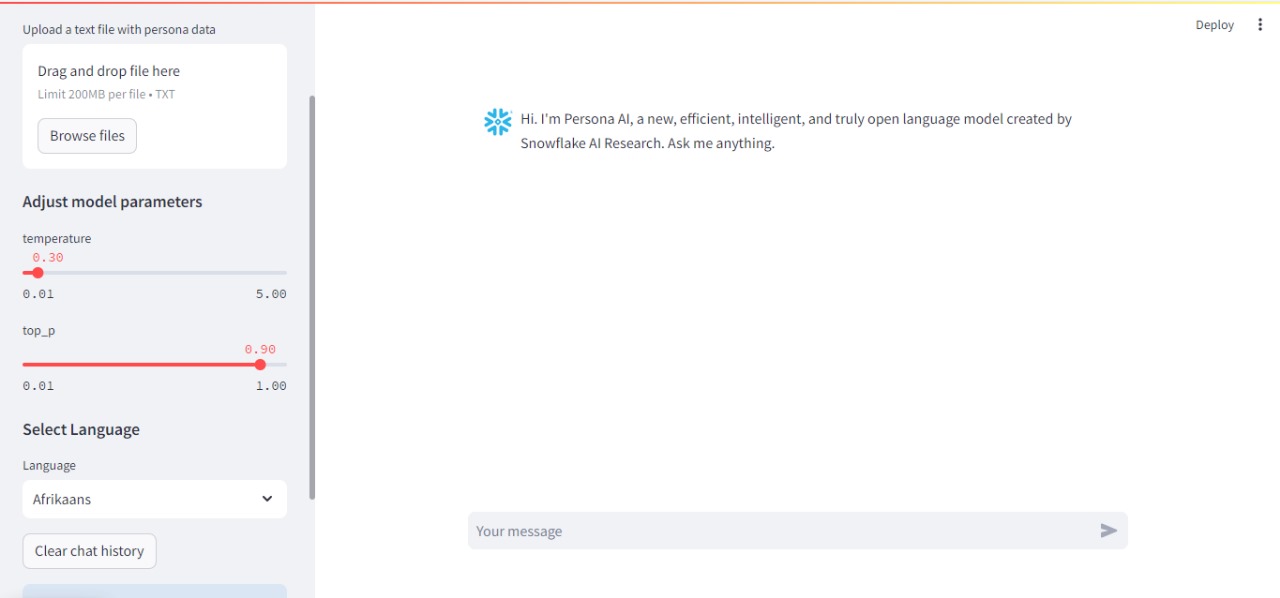
User Persona File Upload:
- Implement functionality to upload a text file containing persona data.
- Parse the uploaded file to extract key-value pairs for persona attributes.
- Store the persona data in the session state and the database.
Step 5: Generating Responses with Replicate API
Tokenization:
- Use the Transformers library to tokenize user inputs and check the length to avoid exceeding token limits.
Generate Responses:
- Construct a prompt from the chat history and persona data.
- Send the prompt to the Replicate API to generate responses using Snowflake’s Arctic language model.
- Handle the responses and update the chat history in the session state.
Step 6: Text-to-Speech Integration
Convert Text to Speech:
- Use gTTS to convert text responses to speech.
- Encode the audio and prepare it for playback.
Playback Audio Responses:
- Use Streamlit-Player to play the generated speech within the Streamlit app.
Step 7: Adding Multilingual Support
Text and Audio Language Options:
- Implement dropdowns or radio buttons in the Streamlit sidebar for users to select their preferred language for text and speech.
- Update the response generation and text-to-speech functions to handle the selected language.
Step 8: Final Testing and Deployment
Test the Application:
- Thoroughly test all features, including chat functionality, persona data handling, multilingual support, and text-to-speech conversion.
- Ensure the app performs well with various inputs and scenarios.